This post may contain affiliate links. Please read my disclosure policy.
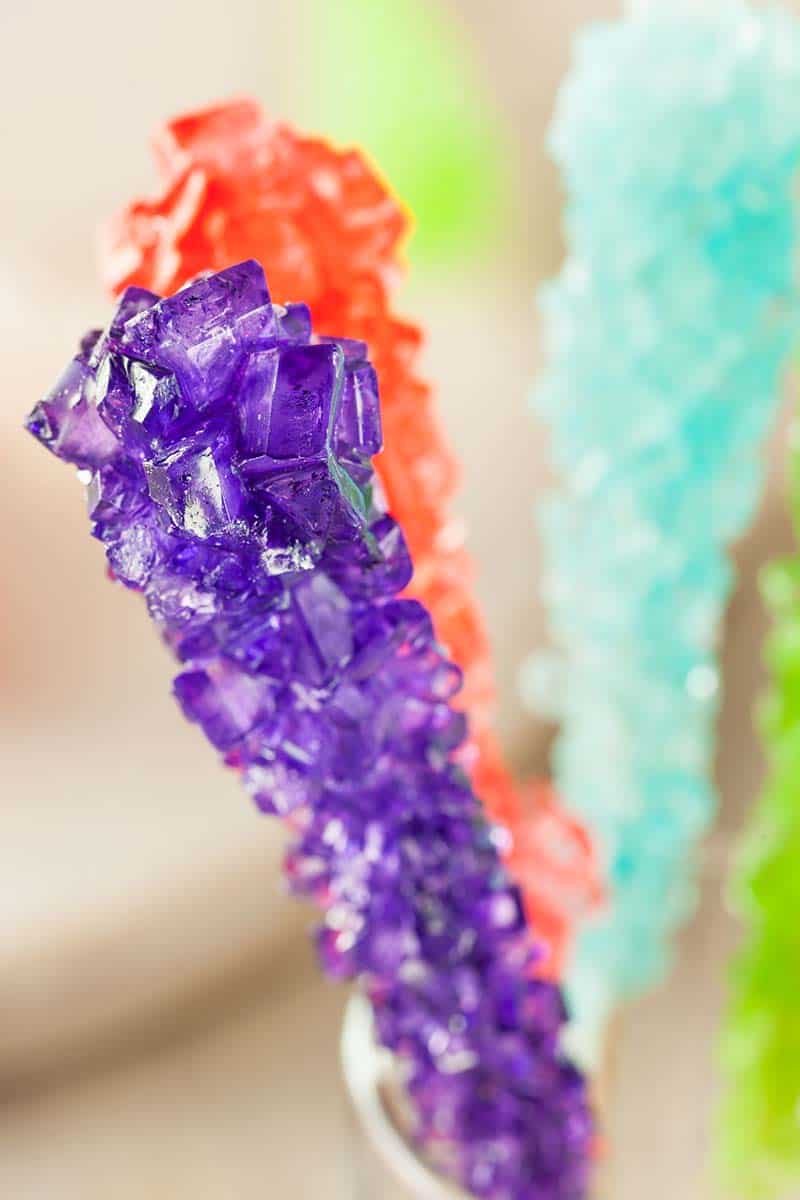
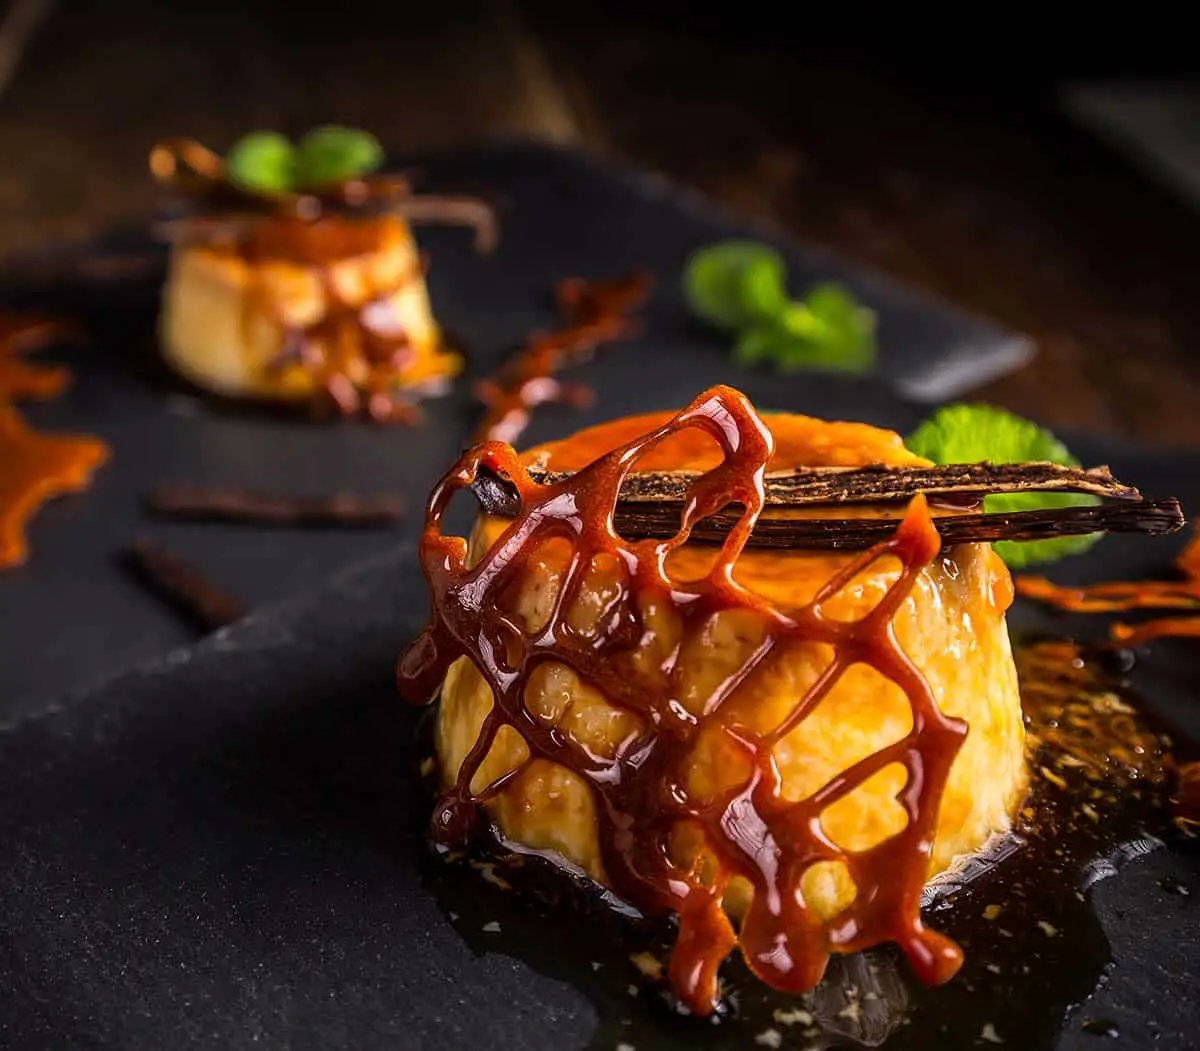
Making Rock Candy Geodes At Home
Rock candy geodes are fast becoming a trend among bakers, making geode cakes, cupcakes, and cookies that are so Instagrammable. It’s also taking Pinterest by storm.
I first saw it a couple of years ago in a baking competition on Netflix where the bakers’ task was to make an IG-worthy wedding cake and one team made a lovely geode cake. The process wasn’t highlighted that much, but that was my first encounter of geodes in desserts and I found myself googling how to make rock candy geodes for a few hours.
Besides being a trend in making pastry and as a garnish for other treats, you can also make them just to be enjoyed as rock candies. I also found that the process also makes a fun candy science experiment for kids. And it’s always a pleasure when you can make so many color and flavor combinations.
I checked and I have all the ingredients I need to make geode candies. And since I need to keep the kids busy these days, I decided to involve them in another kitchen science activity. They loved making rock candy on a string, so I’m sure they’ll love this!
Using Rock Candy Geodes for Kid’s Geology Activity
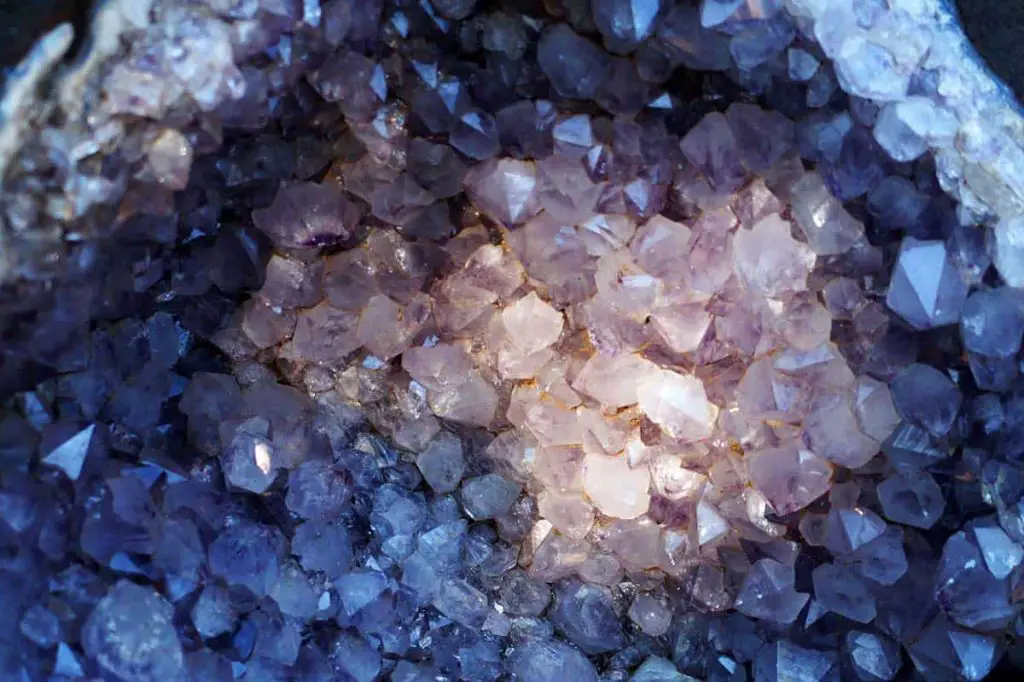
First things first, what are geodes? They are small cavities in rocks that are lined with mineral matters or crystals.
They are formed in holes inside a rock or hollow spaces of soil such as tree roots or animal tunnels or dens. When liquid minerals that enter these cavities evaporate, they gradually form a hardened outer shell we call geodes. These geodes contain crystals that are called nodules.
On the other hand, geodes can also be formed in the bubbles found in volcanic rocks.
Wherever they form, the bottom line is that they usually develop in cavities where dissolve minerals seep. Over time, the liquid minerals evaporate and create crystals enclosed in hardened shells inside the cavities.
When the shell is cracked, you will find it filled with crystallized minerals.
This kitchen science experiment will help the kids experience the process of forming geodes and nodules. And because they’re edible, it will make them more excited to do it.
We will replicate geode forming using edible materials your kids will surely love.
Just a warning though. The activity requires melting sugar at high heat, so adult supervision is required to avoid burns. Don’t let the kids do this on their own.
How To Make Rock Candy Geodes
There are two parts to this activity. The first part is making the shell, the second part is making the sugar crystals. Both are very easy to make but requires time, most especially the part where we wait for the sugar crystals to form.
But since this is the science part of it, you will have a great opportunity to let your kids learn the whole process behind geode forming.
How to Make the Hard Shell
The hard shell is made of gum paste. It’s a fondant icing that is commonly used in cakes and cupcakes, and we will use the same basic recipe for our geodes.
You can buy a ready-made gum paste or you can make one on your own using the below recipe.
Ingredients
- 1 lb marshmallows
- 1 lb confectioner’s sugar
- Shortening
- Gum-Tex powder
- Black food coloring
- Peppermint flavoring extract
Other things you will need:
Instructions
STEP 1 – Melt the marshmallows in the microwave. Place it on high heat for 1 minute and 20 seconds but take out and stir every 15 seconds.
STEP 2 – Add in the confectioner’s sugar and mix until well blended and cool enough to be kneaded.
STEP 3 – Coat a portion of your countertop or board with some sugar, then coat your hands with shortening. Start kneading the sugar dough.
STEP 4 – When your dough is flexible enough, sprinkle a little Gum-Tex on top and knead again until well combined. The role of Gum-Tex in this process is to help ensure your sugar dough holds its shape.
STEP 5 – Cut the gum paste in two and add in the flavoring.
STEP 6 – Set aside one half of the gum paste and add food coloring to the other half. I mixed a few drops of black coloring with water to lighten the color a bit. This is to make the geode appear grayish to achieve a more realistic rock color.
STEP 7 – Leave both for at least 2 hours.
STEP 8 – After 2 hours, roll out both the white and colored gum paste.
STEP 9 – Wet the colored gum paste lightly and stick it to the white one. The white part will serve as the inner lining of the geode.
STEP 10 – Roll and cut it according to the size you need for your molds.
STEP 11 – Line the molds with foil for easier removal of the shells later.
STEP 12 – Press the gum paste into your mold and let it harden in a warm and dry area for 24 hours. The white side should be the one showing on top when you mold your gum paste. The bottom part, which is the colored side which will be the exterior of the rock later on.
How to Make the Crystals
Once the shells have hardened, proceed to make the sugar crystals.
This is the part where adult supervision is required. Don’t let the kids make the syrup on their own.
Ingredients
- ½ cup of water
- 2 cups granulated sugar
- Blue food coloring
- Raspberry flavoring extract
Instructions
STEP 1 – Make a supersaturated sugar solution by boiling together ½ cup of water and 2 cups of sugar over medium heat.
STEP 2 – Bring to a boil and ensure your mixture reaches 237 degrees Fahrenheit using a candy thermometer.
STEP 3 – Remove the pan from the heat and add in the flavoring extract and food coloring. Let it cool for a bit.
STEP 4 – Set the molds in tinfoil with the gum paste shells still on it. Make sure the size of the tin foil is enough to cover each mold later on.
STEP 5 – Pour the cooled syrup into the gum paste shells.
STEP 6 – Slowly wrap the tinfoil around the mold and fold it to ensure that the gum paste shells and syrup are completely wrapped.
STEP 7 – Leave in a warm place undisturbed for at least one week. This should be enough for the crystals to grow bigger, but you may leave it a few days longer if you want more crystals to form.
STEP 8 – Unwrap the molds and turn upside down to drain the excess liquid. Carefully release each shell and leave unturned for a couple of days to dry.
STEP 9 – Your geodes should be ready after two days of drying. Serve and let the kids enjoy!
Print
Rock Candy Geodes Recipe
- Total Time: 26 minutes
- Yield: 12 candies 1x
Description
There are two parts to this recipe. First is the hard shell of the geode and second is the crystal inside. I’ve broken them apart in this post card and I’ve also written them out separately below this recipe card.
Ingredients
Ingredients for the hard shell:
- 1 lb marshmallows
- 1 lb confectioner’s sugar
- Shortening
- Gum-Tex powder
- Black food coloring
- Peppermint flavoring extract
Ingredients for the crystals:
- ½ cup of water
- 2 cups granulated sugar
- Blue food coloring
- Raspberry flavoring extract
Kitchen tools you’ll need:
- Silicon cake pop molds
- Tinfoil
- Candy thermometer (this is the one I use)
Instructions
Instructions for the hard shell:
- Melt the marshmallows in the microwave. Place it on high heat for 1 minute and 20 seconds but take out and stir every 15 seconds.
- Add in the confectioner’s sugar and mix until well blended and cool enough to be kneaded.
- Coat a portion of your countertop or board with some sugar, then coat your hands with shortening. Start kneading the sugar dough.
- When your dough is flexible enough, sprinkle a little Gum-Tex on top and knead again until well combined. The role of Gum-Tex in this process is to help ensure your sugar dough holds its shape.
- Cut the gum paste in two and add in the flavoring.
- Set aside one half of the gum paste and add food coloring to the other half. I mixed a few drops of black coloring with water to lighten the color a bit. This is to make the geode appear grayish to achieve a more realistic rock color.
- Leave both for at least 2 hours.
- After 2 hours, roll out both the white and colored gum paste.
- Wet the colored gum paste lightly and stick it to the white one. The white part will serve as the inner lining of the geode.
- Roll and cut it according to the size you need for your molds.
- Line the molds with foil for easier removal of the shells later.
- Press the gum paste into your mold and let it harden in a warm and dry area for 24 hours. The white side should be the one showing on top when you mold your gum paste. The bottom part, which is the colored side which will be the exterior of the rock later on.
Instructions for the crystals:
- Make a supersaturated sugar solution by boiling together ½ cup of water and 2 cups of sugar over medium heat.
- Bring to a boil and ensure your mixture reaches 237 degrees Fahrenheit using a candy thermometer.
- Remove the pan from the heat and add in the flavoring extract and food coloring. Let it cool for a bit.
- Set the molds in tinfoil with the gum paste shells still on it. Make sure the size of the tin foil is enough to cover each mold later on.
- Pour the cooled syrup into the gum paste shells.
- Slowly wrap the tinfoil around the mold and fold it to ensure that the gum paste shells and syrup are completely wrapped.
- Leave in a warm place undisturbed for at least one week. This should be enough for the crystals to grow bigger, but you may leave it a few days longer if you want more crystals to form.
- Unwrap the molds and turn upside down to drain the excess liquid. Carefully release each shell and leave unturned for a couple of days to dry.
- Your geodes should be ready after two days of drying. Serve and let the kids enjoy!
- Prep Time: 6 minutes
- Cook Time: 20 minutes
- Category: Candy