This post may contain affiliate links. Please read my disclosure policy.
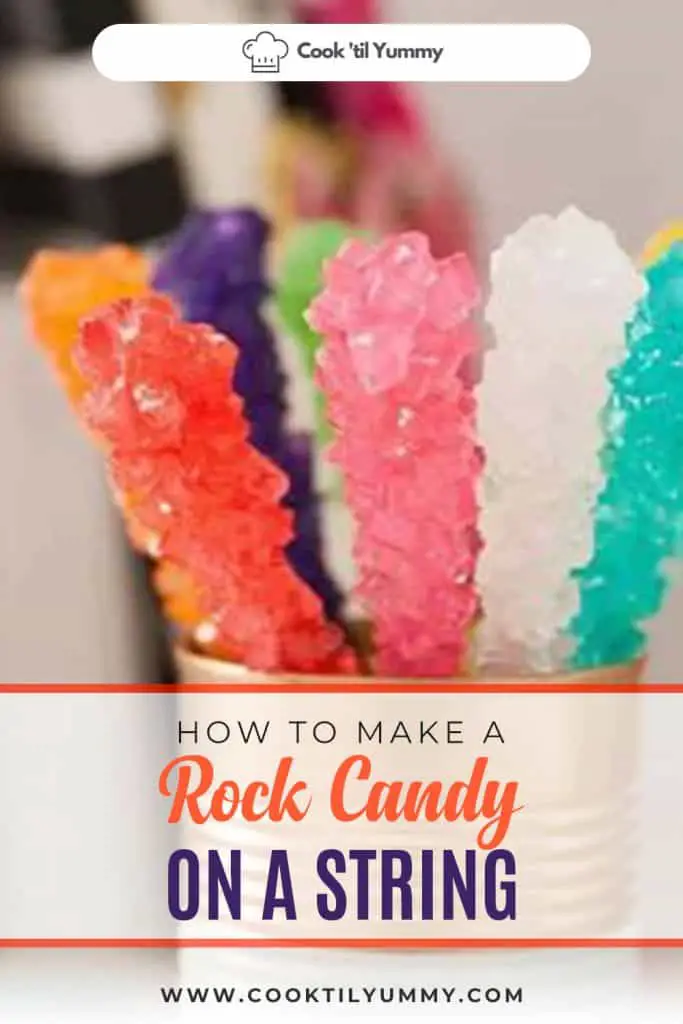
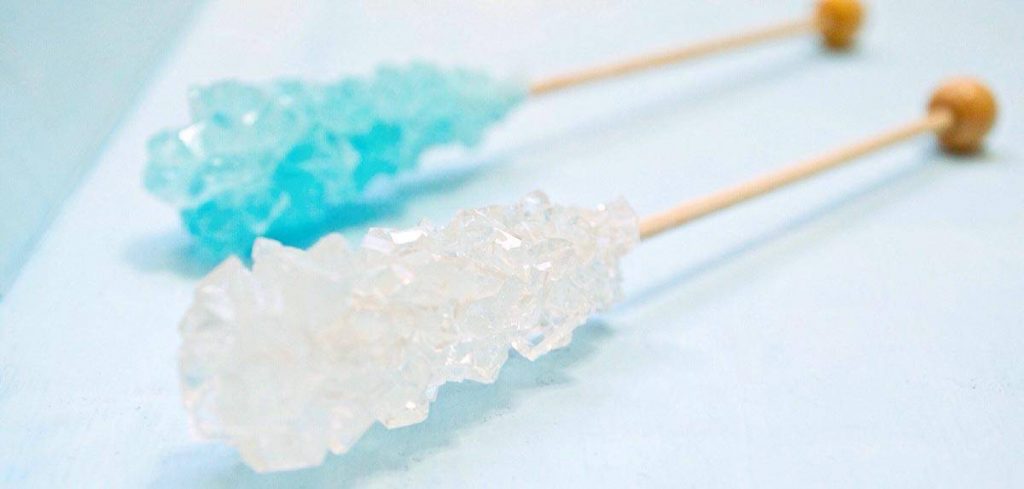
In one of my previous posts, I shared with you my recipe on How To Make Hard Rock Candy. That recipe is intended for rock candies on a stick. Forgive me for using the same images from that recipe, I usually always make my rock candy on a stick, but sometimes they can be hard to find, the end result will look similar.
This time, we will make a similar one but on a string. It’s basically the same process but using a different medium where the sugar crystals will grow.
Here’s how to make rock candy on a string.
Making rock candies is always fun, and it’s easy to make. The ingredients are easy to find and it makes for a good science project for the kids, too. All it takes is a few things and a little patience.
The preparation takes only a few steps but it will take some time for the crystals to start to form and grow in the string. Leaving it out for a few days will give time for the crystals to grow bigger.
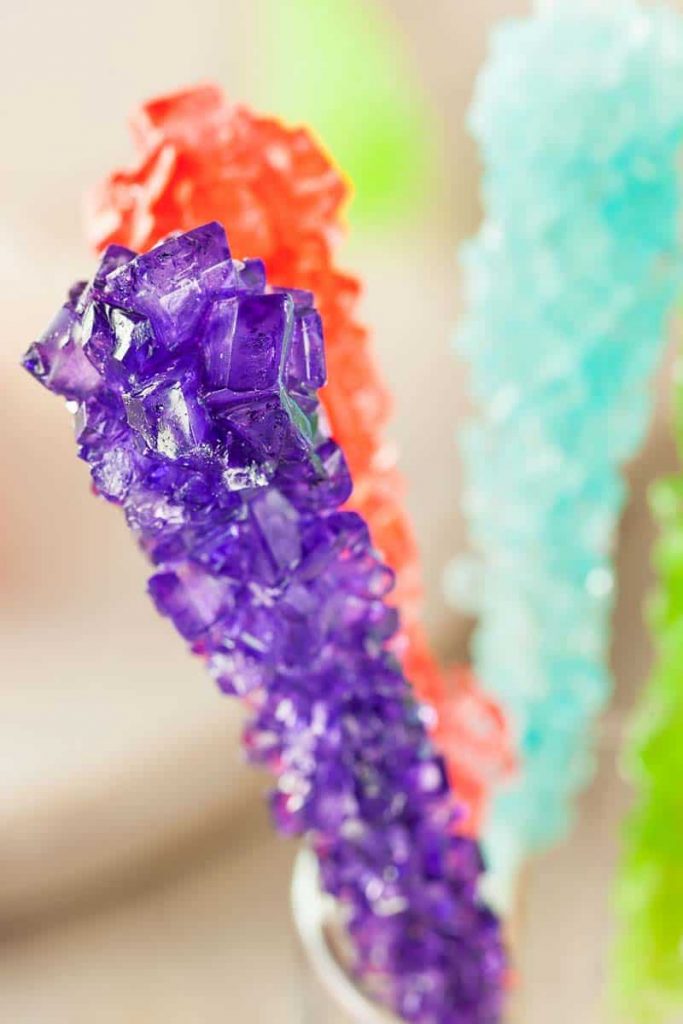
There are so many colors and flavors you can play around with, making it more fun to explore. This activity isn’t just for the kids, it can also bring out the inner scientist in anyone who’s interested to give it a shot.
The Science Behind Rock Candies
How sugar crystals form in strings is just the same as how they form in sticks. The general science behind it works the same way.
A supersaturated solution is created by heating a saturated sugar solution that contains more sugar (solute) than what can be dissolved by the water (solvent).
By using a stick or a string that we hang in the middle of a container, we pour in the solution and leave it to create the crystals that will form in the stick or string.
The sugar will accumulate in the bottom of the container and will later form solid particles. These solid particles are called precipitation and the sugar crystals are what we call precipitate.
Also, as the solvent (water) cools and evaporates, the sugar solution becomes more saturated and forms more crystals. This is because the sugar molecules are moving at a slower pace and are actively forced back together.
In the process, more sugar crystals are formed, and leaving it for longer periods is how rock candies are made.
In this case, since we are using string, then this is basically how to make rock candy on a string.

FLAVOR VARIATIONS
Whatever flavor you have in mind, you can explore and make flavor and color combinations on your own. But just in case you need some recommendations, here are some combinations that I’ve used before.
- Blue for raspberry or blueberry
- Light blue or light pink for gummy or tutti frutti flavors
- Pink for strawberry
- Yellow for banana or lemon
- Green for peppermint, green apple, or kiwi
- Orange for cinnamon or buttered rum or maple syrup
- Red for cherry
- Purple for grape
Rock Candy On A String Recipe
- Total Time: 20 minutes
- Yield: 8 candies 1x
Description
The preparation is only a few steps, but it will take some time for the crystals to form and grow. Leaving it out for a few days will give time for the crystals to grow bigger.
Forming Time: At least 6 hours to 1 week
Ingredients
- 4 cups of water
- 8 cups white granulated sugar
- Optional: 4 drops food coloring, 4 different colors
- Optional: 1 teaspoon flavoring extract or oil, 4 different flavors
Kitchen tools you’ll need:
- 8 thick cotton thread or kitchen twine
- 8 wooden skewers or straws
- A tall narrow glass or jar
Instructions
STEP 1 – Prepare your materials
Before using the glass jars, wash them thoroughly with hot water. Dry the jars before assembling.
To assemble the glass jars, cut the strings at a height slightly taller than the jars.
Make sure that the strings are clean as well. Wet them with water and roll in granulated sugar. The sugared string will serve as a base layer where the sugar crystals will grow in the process later.
Tie the sugared string to the skewer or straw. Place the skewer across the glass jar to dry in a way that the string is hanging in the middle of the jar. Make sure that the string does not touch the bottom of the jar. The gap should be about an inch.
Repeat the process for the rest of the strings and set aside.
STEP 2 – Make the sugar syrup
In a medium-sized pan, boil the water and add the sugar gradually. You may do this one cup at a time, stirring the mixture after adding the sugar.
You will notice that while you add more sugar, it will take more time to dissolve. This is the saturated effect we’re looking for.
Repeat the process for the rest of the sugar and stir.
Once the sugar is completely dissolved, remove the pan from the heat.
STEP 3 – Add flavors and colors to the syrup
Divide the sugar mixture according to the number of flavors and color combinations you will be working on.
Since I’m using 4 combinations in this recipe, then I divided my mixture into 4 bowls. I assigned a flavor for each color to make it more fun.
While the syrup is still hot, add the colors and flavors and mix until well combined.
If you follow my mixture, you will come up with 2 rock candies for each flavor, but feel free to make your own adjustments. If you’re working on lesser or more combinations, that’s completely fine.
This step is not really critical in the crystallization process, so any changes you make is fine.
STEP 4 – Let cool
Let the sugar mixture cool for about 10 minutes.
Before you pour the mixture over the glass jars, remove the strings to keep the sugar in the strings intact.
After pouring the syrup into the jars, slowly return the strings into each jar keeping in mind the one-inch gap from the bottom.
STEP 5 – Leave in a cool place
Cover the top of the jars loosely with a plastic wrap or paper towel and position away from the direct sunlight.
Normally, you should start seeing crystals forming in a couple of hours. Leaving it longer will allow the crystals to grow bigger.
If after 24 hours you notice that there are no crystals forming, it means that the mixture is not saturated enough. You can fix this by reheating the mixture and adding more sugar along the way. Repeat step 4 after.
STEP 6 – Allow the sugar crystals to grow
You may leave the mixture for several days to allow it to grow bigger. A reminder on this though, leaving it out for too long will cause the crystals to grow on the sides of your jars.
If the crystals are big enough, remove the string from the glass jars and line them up on a plate or tray to dry.
Store the rock candies in an airtight container or in individual plastic wraps.
- Prep Time: 20 minutes
- Cook Time: 0 minutes