This post may contain affiliate links. Please read my disclosure policy.
Homemade Chocolate Mousse using Melted Chocolate Recipe
If you’re looking to indulge in a delicious and creamy dessert, look no further than chocolate mousse made with melted chocolate. In this guide, we will walk you through the simple steps to create this decadent treat that is sure to satisfy your sweet tooth. Get ready to impress your friends and family with this irresistible homemade delight!
To make chocolate mousse with melted chocolate, you will need the following ingredients:
- 8 ounces of high-quality dark or semi-sweet chocolate
- 4 large eggs, separated
- 1/4 cup of granulated sugar
- 1 teaspoon of vanilla extract
- A pinch of salt
- 1 cup of heavy cream
The dark or semi-sweet chocolate is the star ingredient in this recipe and will provide the rich and decadent flavor that makes chocolate mousse so irresistible. Make sure to use a good quality chocolate for the best results.
How to melt chocolate for the mousse
Melting chocolate properly is crucial to achieving a smooth and silky texture in your mousse. Here’s a simple method to melt the chocolate without burning it:
- Chop the chocolate into small pieces to ensure even melting.
- In a heatproof bowl, place the chopped chocolate.
- Create a double boiler by placing the bowl over a pot of simmering water. Make sure the bottom of the bowl does not touch the water.
- Gently stir the chocolate until it melts completely and becomes smooth. Be careful not to overheat or let any water come into contact with the chocolate, as it can cause it to seize or become grainy.
- Once melted, remove the bowl from heat and set aside to cool slightly before incorporating it into your mousse mixture.
This gentle melting method helps prevent scorching and ensures that your melted chocolate is smooth and glossy, ready to be incorporated into the mousse.
Using a double boiler
One of the most reliable methods for melting chocolate without burning it is by using a double boiler. This involves creating a gentle indirect heat source to slowly melt the chocolate. To do this, fill a saucepan with about an inch of water and place it on the stove over medium heat. Then, find a heatproof bowl that fits securely on top of the saucepan without touching the water. Break your chocolate into small pieces or chop it finely and place it in the bowl. As the water heats up, the steam will gently warm the bowl and melt the chocolate without scorching or burning it.
Tips:
- Make sure that no water gets into the chocolate as even a small amount can cause it to seize and become lumpy.
- Stir the chocolate occasionally with a spatula or whisk to ensure even melting.
Using a microwave
If you prefer a quicker method, you can also melt chocolate in a microwave. However, it requires extra care to prevent overheating and burning. Start by chopping your chocolate into small, uniform pieces and place them in a microwave-safe bowl. Microwave on low power or using short bursts of 15-20 seconds at medium power, stirring well between each interval. Be cautious not to exceed the recommended time as microwaves vary in strength and too much heat can scorch the chocolate.
Tips:
- Avoid using high power settings as they can easily burn the chocolate.
- Use oven mitts or kitchen towels when handling hot bowls from the microwave.
Melting chocolate with hot water bath
Another method for melting chocolate without burning it is by using a hot water bath. This technique involves placing the chocolate in a heatproof bowl and setting it over a larger bowl filled with hot water. The steam from the hot water will gently warm the bowl and melt the chocolate. Stir occasionally to ensure even melting.
Tips:
- Do not let any water get into the chocolate as it can cause clumping.
- Make sure the heatproof bowl is stable and won’t tip over into the water bath.
What to do after the chocolate is melted
1. Pour the melted chocolate into molds
Once the chocolate has melted to a smooth and silky consistency, it is ready to be poured into molds. Choose your desired mold shape, such as hearts, stars, or simple squares. Place the mold on a flat surface lined with parchment paper or a silicone mat to prevent sticking. Carefully pour the melted chocolate into each cavity of the mold, ensuring that they are evenly filled. Use a spatula or the back of a spoon to smooth out the top surface of the chocolate in each cavity.
Tips for pouring chocolate into molds:
- Tap the filled mold gently on the countertop to remove any air bubbles trapped in the chocolate.
- If using intricate molds, use a squeeze bottle or piping bag for more precise filling.
- Wipe away any excess chocolate from around the edges of each cavity to ensure clean shapes.
2. Add delicious fillings and toppings
To take your homemade chocolates to another level, consider adding delicious fillings and toppings. Once you have poured the melted chocolate into molds and before it sets completely, you can add various fillings like caramel, nuts, dried fruits, or even peanut butter. Simply place a small amount of your chosen filling in each cavity on top of the poured chocolate layer. After adding fillings, you can also enhance your chocolates with delightful toppings. Sprinkle crushed cookies, colorful sprinkles, shredded coconut, or finely chopped nuts over each cavity while the chocolate is still soft and tacky.
Ideas for fillings and toppings:
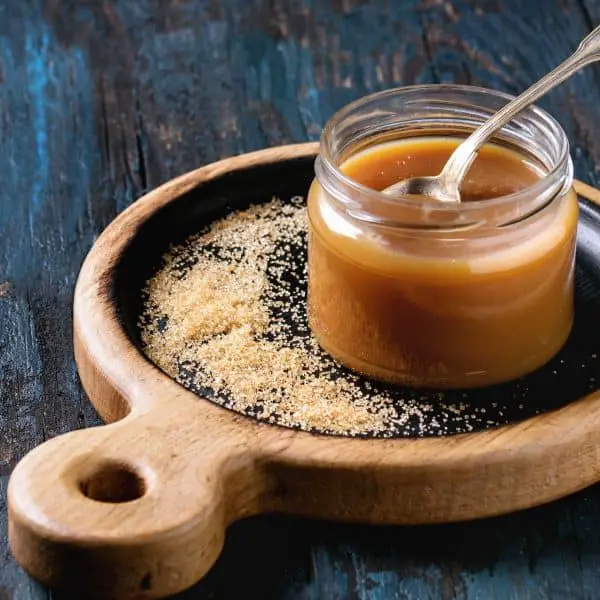
- Caramel: Create a caramel-filled center by placing a small piece of soft caramel candy in each cavity.
- Nuts: Add a crunchy surprise by placing a whole nut or chopped nuts on top of the filling before pouring more melted chocolate over it.
- Sea salt: Sprinkle a pinch of flaky sea salt over each cavity to create a delicious sweet and salty combination.
Remember to let the filled molds sit at room temperature until the chocolate has fully set. This usually takes around 1-2 hours, but you can speed up the process by placing them in the refrigerator for about 30 minutes. Once set, carefully remove the chocolates from the molds by gently pressing on the bottom of each cavity or flexing the mold slightly. Enjoy your homemade chocolates as they are or wrap them beautifully for gifting to loved ones!
Using the right ingredients
To achieve a smooth and creamy texture in your mousse, it is crucial to use the right ingredients. Start by choosing high-quality chocolate or fruit puree as the base for your mousse. Opt for dark chocolate with a high percentage of cocoa solids for a rich and intense flavor. If you’re making a fruit mousse, select ripe and flavorful fruits that will add natural sweetness and enhance the overall texture.
Tip: For a velvety smooth texture, ensure that all your ingredients are at room temperature before starting. This includes eggs, cream, and any other components you plan to incorporate into the mousse.
Properly tempering the ingredients
Tempering is an essential step in achieving a smooth and creamy texture in your mousse. When working with chocolate, it is important to melt it gently and gradually to avoid seizing or graininess. Use a double boiler or microwave in short bursts, stirring frequently until the chocolate is completely melted and smooth. When incorporating eggs into your mousse recipe, make sure to temper them properly. Gradually whisk some of the warm mixture into the beaten eggs to bring them up to temperature without scrambling them. This step ensures that the eggs blend seamlessly into the mixture, contributing to a silky-smooth texture.
Tip: If you’re concerned about using raw eggs in your mousse, consider using pasteurized egg products or opting for eggless recipes that utilize alternative thickeners like gelatin or agar-agar.
The importance of proper folding technique
The way you fold together different components plays a significant role in determining the final texture of your mousse. Whether you’re combining whipped cream with melted chocolate or folding in fruit puree, it’s crucial to use gentle folding motions to preserve airiness and prevent deflation. Start by adding a small amount of the lighter ingredient, such as whipped cream or egg whites, to the heavier component. Use a spatula or whisk to gently fold the mixture together in a circular motion, ensuring all ingredients are thoroughly incorporated without overmixing. This technique helps maintain the desired light and airy texture.
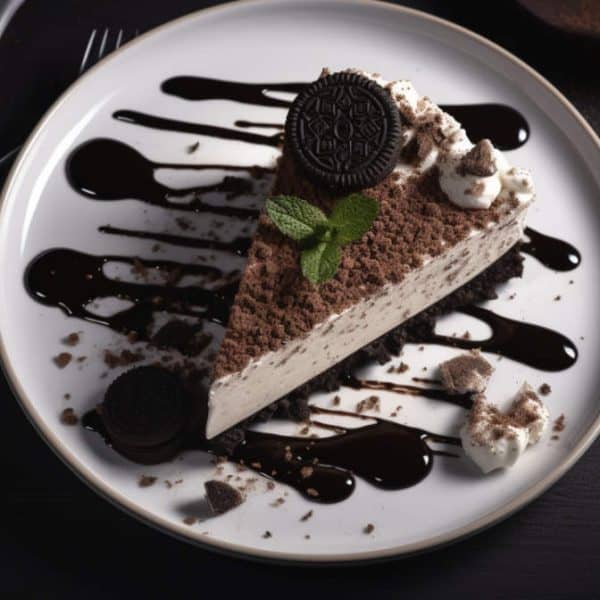
Tip: To add extra flavor and texture to your mousse, consider incorporating mix-ins like crushed cookies, chopped nuts, or grated chocolate. Fold these additions into the mousse just before transferring it to serving dishes for an added surprise in every bite. By following these tips and techniques, you can achieve a smooth and creamy texture in your mousse that will impress both your taste buds and those of anyone lucky enough to enjoy your delicious creation. Experiment with different flavors and combinations to create unique variations of this classic dessert.
Common additional ingredients for chocolate mousse
1. Liquors and Liqueurs
Adding a splash of liquor or liqueur to your chocolate mousse can elevate its flavor profile and add a hint of sophistication. Popular choices include Grand Marnier, Kahlua, Bailey’s Irish Cream, or Amaretto. These spirits not only infuse the mousse with their distinct flavors but also help to enhance the richness of the chocolate. When incorporating liquor, start by adding a small amount and gradually increase according to your taste preference.
Here are some examples:
- Grand Marnier: This orange-flavored liqueur adds a subtle citrusy note that complements the chocolate perfectly.
- Kahlua: The coffee-infused taste of Kahlua pairs exceptionally well with dark chocolate, creating a delightful mocha-like flavor.
- Bailey’s Irish Cream: The creamy and smooth nature of Bailey’s blends harmoniously with chocolate, resulting in a luscious and indulgent mousse.
- Amaretto: This almond-flavored liqueur imparts a nutty essence that beautifully enhances the sweetness of chocolate.
2. Spices and Extracts
Spices and extracts are another way to add depth and complexity to your chocolate mousse. A pinch of spice can transform an ordinary mousse into something extraordinary. Common spices used in chocolate mousse recipes include cinnamon, nutmeg, cardamom, or chili powder. Additionally, extracts like vanilla or peppermint can provide aromatic undertones that complement the rich cocoa flavor.
Here are some examples:
- Cinnamon: The warm and comforting essence of cinnamon pairs exceptionally well with chocolate, creating a cozy and aromatic mousse.
- Nutmeg: Adding a touch of nutmeg imparts a subtle earthiness that enhances the overall flavor profile of the mousse.
- Cardamom: This fragrant spice adds an exotic twist to chocolate mousse, infusing it with hints of citrus and floral notes.
- Chili Powder: For those who enjoy a hint of heat, adding a pinch of chili powder can create a tantalizing balance between sweet and spicy in your mousse.
3. Fruits and Nuts
Incorporating fruits or nuts into your chocolate mousse can provide contrasting textures and flavors that elevate the dessert to new heights. Fresh berries like raspberries, strawberries, or blueberries add a burst of freshness and tanginess. Alternatively, you can opt for roasted nuts such as almonds, hazelnuts, or pistachios to introduce crunchiness and nutty undertones.
Here are some examples:
- Raspberries: The tartness of raspberries cuts through the richness of the chocolate, creating a harmonious balance between sweet and sour.
- Strawberries: The natural sweetness of strawberries complements the chocolate beautifully while adding vibrant color to your mousse.
- Blueberries: These tiny bursts of juiciness bring a refreshing element to chocolate mousse, enhancing its overall taste experience.
- Almonds: Roasted almonds provide a satisfying crunch and pair wonderfully with the smooth texture of chocolate mousse.
By experimenting with these additional ingredients, you can customize your chocolate mousse to suit your preferences and create a dessert that is truly unique and delightful.
Choosing the right type of chocolate for making mousse
Different Types of Chocolate
When it comes to making mousse, choosing the right type of chocolate is crucial as it greatly impacts the flavor and texture of the final dessert. There are various types of chocolate available in the market, each with its own characteristics. The most common types used for making mousse include dark chocolate, milk chocolate, and white chocolate.
Dark Chocolate
Dark chocolate is a popular choice for making mousse due to its intense flavor and lower sugar content compared to other types. It contains a higher percentage of cocoa solids, usually ranging from 60% to 90%. The higher cocoa content lends a rich and slightly bitter taste to the mousse, which pairs well with sweet toppings or fruits. If you prefer a more sophisticated and less sweet mousse, opt for dark chocolate with a higher cocoa percentage.
Milk Chocolate
Milk chocolate has a smoother and sweeter taste compared to dark chocolate. It contains a lower percentage of cocoa solids (around 30% to 40%) and is combined with milk powder or condensed milk during its production. This results in a creamier texture that works well in creating a lighter and sweeter mousse. Milk chocolate is an excellent choice if you prefer a more indulgent and mild-flavored dessert.
White Chocolate
Contrary to its name, white chocolate does not contain any cocoa solids but is made from cocoa butter, sugar, milk solids, and vanilla. It has a creamy texture and a delicate sweetness that adds elegance to any mousse recipe. While some argue that white chocolate is not technically “chocolate” due to the absence of cocoa solids, it still serves as an excellent option for those who enjoy its unique flavor profile.
- Consider the flavor profile you desire for your mousse. Dark chocolate offers a rich and slightly bitter taste, while milk chocolate provides a creamier and sweeter experience. White chocolate adds a delicate sweetness to the mousse.
- Check the cocoa percentage on the packaging. Higher percentages indicate a more intense chocolate flavor, whereas lower percentages result in a milder taste.
- If possible, opt for high-quality chocolate brands that use premium ingredients. This will ensure better flavor and texture in your mousse.
Adding Fruit Flavors
If you want to add a burst of fruity goodness to your chocolate mousse, there are several options to consider. One way is to incorporate fresh fruits into the mousse itself. For instance, you can puree strawberries or raspberries and fold them into the chocolate mixture before chilling it. This will not only infuse the mousse with a vibrant color but also lend a subtle tangy flavor that complements the richness of the chocolate.
Another option is to create a fruit coulis as a topping for your chocolate mousse. To make a coulis, simmer berries like blueberries or blackberries with sugar and water until they break down and form a thick sauce. Drizzle this luscious coulis over your chilled chocolate mousse just before serving for an elegant presentation and an explosion of fruity taste.
Fruit Variations:
- Strawberry
- Raspberry
- Blueberry
- Blackberry
Tips for Incorporating Fruit:
- Ensure that any fresh fruits you use are ripe and flavorful.
- Gently fold the pureed fruits into the chocolate mixture to maintain a light and airy texture.
- If using frozen fruit, thaw it completely and drain any excess liquid before incorporating it into the mousse.
- When making fruit coulis, strain it through a fine-mesh sieve after simmering to remove any seeds or pulp.
Experimenting with Nutty Additions
If you’re looking to introduce some nutty flavors into your chocolate mousse recipe, there are various nuts that pair exceptionally well with chocolate. One popular choice is hazelnuts. You can incorporate these by toasting and finely chopping them before adding them to the mousse mixture. The crunchy texture and distinct nutty taste of hazelnuts will add a delightful contrast to the smoothness of the mousse.
Alternatively, you can use almond extract or ground almonds to infuse your chocolate mousse with a subtle almond flavor. Simply add a small amount of almond extract or finely ground almonds to the chocolate mixture while whisking it together. This will give your mousse a lovely nuttiness without overpowering the chocolate.
Nut Options:
- Hazelnuts
- Almonds
Tips for Nutty Additions:
- Toasting nuts before adding them enhances their flavor. Spread them on a baking sheet and toast in the oven at 350°F (175°C) for about 8-10 minutes, or until fragrant.
- Ensure that chopped nuts are finely ground but not turned into a paste, as this may affect the texture of the mousse.
- If using almond extract, start with a small amount and adjust according to your preference, as it can be quite potent.
Plant-based alternatives
One popular option for replacing eggs in mousse recipes is using plant-based alternatives. These alternatives not only provide a similar texture and binding properties as eggs but also cater to those following a vegan or vegetarian diet. One common plant-based alternative is flaxseed or chia seed gel. To make this gel, mix one tablespoon of ground flaxseeds or chia seeds with three tablespoons of water and let it sit for about 10 minutes until it thickens. This gel can then be used as a substitute for one egg in the mousse recipe. Another plant-based alternative is silken tofu. Silken tofu has a smooth and creamy texture that works well in mousse recipes. Simply blend the silken tofu until smooth and use it as a replacement for eggs in equal quantities. It not only adds richness to the mousse but also provides a good source of protein.
Example:
Here is an example of how you can use these plant-based alternatives in a chocolate mousse recipe: Ingredients: – 1 cup dark chocolate chips – 1 cup silken tofu (or 1 tablespoon flaxseed/chia seed gel) – 2 tablespoons maple syrup – 1 teaspoon vanilla extract Instructions: 1. If using flaxseed or chia seed gel, prepare it by mixing one tablespoon of ground flaxseeds or chia seeds with three tablespoons of water. Let it sit for about 10 minutes until it thickens. 2. In a microwave-safe bowl, melt the dark chocolate chips in short intervals, stirring in between, until fully melted and smooth. 3. In a blender or food processor, combine the melted chocolate, silken tofu (or flaxseed/chia seed gel), maple syrup, and vanilla extract. 4. Blend until all ingredients are well combined and the mixture becomes smooth and creamy. 5. Transfer the mousse mixture into serving dishes or glasses and refrigerate for at least 2 hours to set. 6. Serve chilled and enjoy your delicious egg-free chocolate mousse!
Other egg substitutes
Apart from plant-based alternatives, there are other options you can explore to replace eggs in a mousse recipe. One such substitute is aquafaba, which is the liquid found in canned chickpeas or beans. This liquid has similar properties to egg whites and can be whipped into stiff peaks, making it an excellent replacement for eggs in mousse recipes. Another alternative is using applesauce or mashed bananas as a binding agent. These ingredients not only add moisture to the mousse but also contribute to its flavor. However, keep in mind that using fruits like applesauce or mashed bananas might alter the taste of the final product, so choose them based on your preference and the flavor profile of your mousse recipe. In addition to these options, commercial egg replacers are available in stores, specifically designed for baking purposes. These products often come in powder form and can be mixed with water to create an egg-like consistency. They work well as substitutes for eggs in various recipes, including mousses.
Overall, experimenting with different egg alternatives allows you to cater to dietary restrictions and preferences while still enjoying a delicious and creamy mousse dessert.
Setting time for the mousse in the refrigerator
Importance of setting time
Setting time is an essential step when making mousse as it allows the dessert to achieve its desired texture and consistency. By refrigerating the mousse, it gives enough time for it to set and firm up, resulting in a light and airy yet creamy dessert. The setting process also enhances the flavors, allowing them to meld together perfectly.
Recommended time
The exact duration for setting mousse in the refrigerator can vary depending on the recipe and type of mousse being prepared. However, a general guideline is to allow the mousse to chill for at least 2 hours or overnight. This extended period ensures that the mousse has ample time to solidify and develop its characteristic smoothness. During this setting time, it is crucial not to disturb or agitate the mousse as it may affect its texture. It is best to cover the container with plastic wrap or a lid to prevent any unwanted odors from seeping into the dessert.
- For fruit-based mousses: Setting these types of mousses for a longer duration can intensify their fruity flavors while maintaining their delicate texture.
- For chocolate mousses: Allowing chocolate mousses to set overnight enhances their richness and deepens their chocolatey taste.
- For dairy-free mousses: Since these mousses rely on alternative ingredients like coconut milk or tofu, they may require more chilling time compared to traditional recipes.
Remember that if you are short on time, placing the mousse in the freezer can expedite the setting process. However, be cautious not to leave it too long as freezing can cause ice crystals to form, compromising its smoothness. In conclusion, allocating sufficient setting time in the refrigerator is crucial for achieving the perfect mousse. This patient waiting period allows the dessert to solidify, intensify its flavors, and develop its desired texture. So, be sure to plan ahead and give your mousse ample time to chill for a delectable treat.
Making ahead or serving immediately: Chocolate mousse timing
Making ahead:
If you are planning to make chocolate mousse ahead of time, it is important to consider the timing and storage options. One option is to prepare the mousse a day in advance and store it in the refrigerator. This allows the flavors to develop and the texture to set properly. However, keep in mind that the mousse may lose some of its lightness and airiness over time, so it’s best to consume it within 24-48 hours.
Another option is to prepare all the components of the chocolate mousse separately and assemble them just before serving. For example, you can make the chocolate base a day or two in advance and refrigerate it, whip the cream shortly before serving, and then fold them together right before guests arrive. This ensures maximum freshness and maintains the desired consistency of the mousse.
Serving immediately:
If you prefer to serve chocolate mousse immediately after preparation, there are a few factors to consider for optimal results.
Firstly, ensure that all your ingredients are at room temperature before starting. This helps with achieving a smooth texture without any lumps or graininess.
Once your chocolate mousse is ready, it’s important to let it chill in the refrigerator for at least 2-3 hours before serving. This allows it to set properly and enhances its flavor profile. Additionally, chilling also helps improve the texture by giving it a light and airy consistency that melts smoothly on your palate.
Tips for making ahead:
- Store prepared chocolate mousse in an airtight container in the refrigerator.
- Before serving, give it a gentle stir or whisk to re-incorporate any separated ingredients.
- If the mousse becomes too firm after chilling, let it sit at room temperature for a few minutes to soften slightly before serving.
Tips for serving immediately:
- Ensure all ingredients are at room temperature before starting the preparation.
- Chill the mousse in individual serving dishes or ramekins for an elegant presentation.
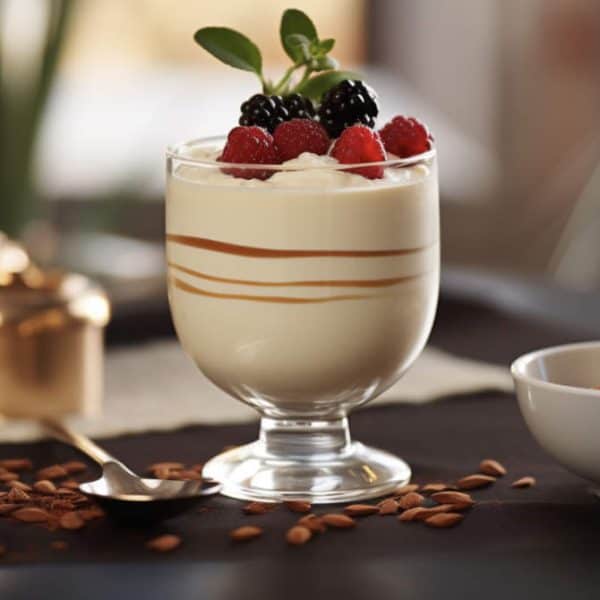
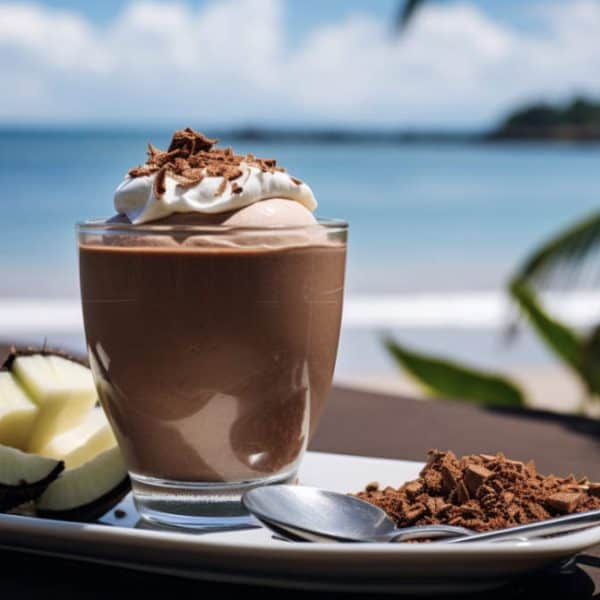
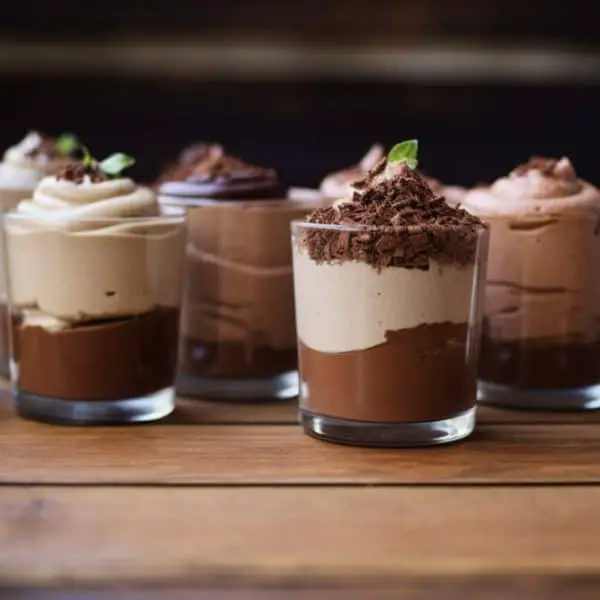
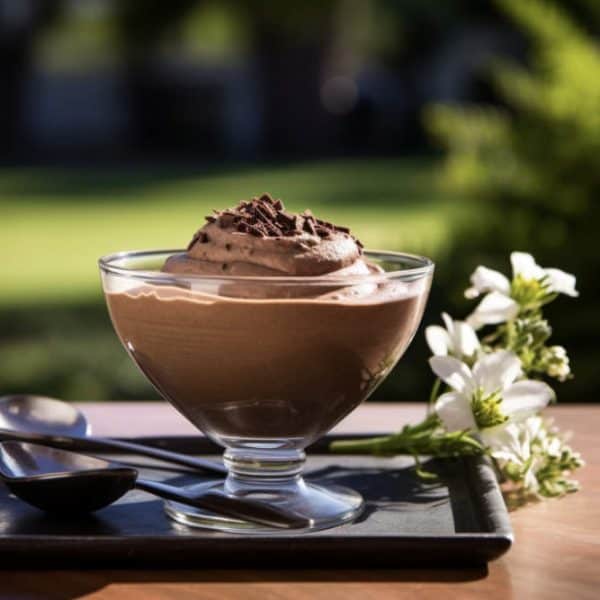
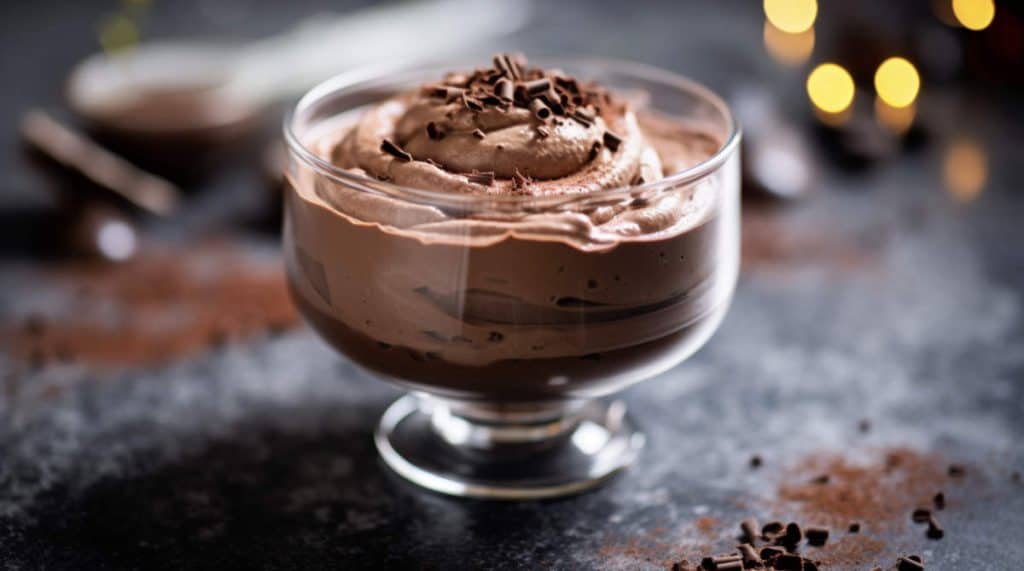
- Garnish with fresh berries, whipped cream, or chocolate shavings just before serving to add visual appeal and complementary flavors.
Fruit Garnishes
One popular choice for garnishing chocolate mousse is fresh fruit. The natural sweetness and juiciness of fruits can provide a refreshing contrast to the rich and creamy texture of the mousse. Some fruits that pair particularly well with chocolate mousse include strawberries, raspberries, and sliced bananas. These fruits not only add a burst of color to the dessert but also offer a delightful combination of flavors.
To enhance the presentation, you can arrange the fruit garnishes in an attractive pattern on top of the chocolate mousse. Alternatively, you can serve the mousse in individual glasses or bowls and place a few pieces of fruit on each serving as a decorative touch. This not only adds visual appeal but also provides a pleasant surprise when your guests dig into their desserts.
Some popular options for fruit garnishes:
- Sliced strawberries
- Raspberries
- Sliced bananas
- Blueberries
- Mango chunks
Nutty Toppings
If you’re looking to add some crunch and nutty flavor to your chocolate mousse, consider using nut-based garnishes. Chopped nuts like almonds, pistachios, or hazelnuts can complement the smoothness of the mousse while providing an interesting textural contrast. You can sprinkle these nuts over the top of the mousse or use them as a border around the dish for an elegant presentation.
For added indulgence, you may also consider incorporating caramelized nuts into your garnish. The sweet and caramelized coating adds an extra layer of flavor that pairs exceptionally well with chocolate. Simply coat your preferred nuts in caramel syrup before allowing them to cool and harden. Once ready, you can break them into small pieces and sprinkle them over the mousse.
Some nut-based garnishes to consider:
- Chopped almonds
- Pistachio crumbs
- Hazelnut praline
- Caramelized walnuts
- Candied pecans
Substituting dairy
If you are following a dairy-free diet, there are several options to make this chocolate mousse recipe suitable for you. Instead of using regular milk or cream, you can opt for non-dairy alternatives such as almond milk, coconut milk, or soy milk. These alternatives work well in providing a creamy texture and a subtle flavor that complements the chocolate. Additionally, you can replace butter with vegan butter or coconut oil to maintain the richness and smoothness of the mousse.
Suggested Ingredients:
- 1 cup almond milk
- 1/4 cup vegan butter or coconut oil
Reducing sugar content
If you are watching your sugar intake, it is possible to adapt this chocolate mousse recipe to be lower in sugar without compromising its taste. One option is to use natural sweeteners like stevia or monk fruit extract instead of granulated sugar. These sweeteners have fewer calories and do not cause spikes in blood sugar levels. You can also decrease the amount of sugar used by half and compensate for the sweetness by adding a small amount of vanilla extract or cinnamon.
Suggested Ingredients:
- 1/2 cup natural sweetener (stevia or monk fruit extract)
- 1/4 teaspoon vanilla extract or cinnamon
Egg-free alternative
If you have an egg allergy or follow a vegan diet, there are substitutes available to achieve the desired texture and consistency of traditional chocolate mousse. One popular substitute is aquafaba, which is the liquid from canned chickpeas. It has similar properties to egg whites and can be whipped into stiff peaks just like egg whites. Another option is using silken tofu, which provides a creamy and smooth texture. Both aquafaba and silken tofu work well in binding the ingredients together and creating a light and airy mousse.
Suggested Ingredients:
- 1/2 cup aquafaba (liquid from canned chickpeas)
- OR
- 1 cup silken tofu
By mastering the art of creating chocolate mousse using melted chocolate, you can indulge in the decadent and irresistible flavors of this classic dessert. With a few simple steps, including melting high-quality chocolate and combining it with eggs, sugar, vanilla extract, and cream, you can create a smooth and velvety mousse that will impress your taste buds. So why wait? Start perfecting your chocolate mousse skills today and treat yourself to a truly indulgent dessert experience.
Dietary Considerations:
- Gluten-Free: This recipe is naturally gluten-free. However, always check the labels of ingredients to ensure no gluten-containing additives are present.
- Vegetarian: This recipe is suitable for vegetarians.
- Lactose Intolerance: This recipe contains dairy. If you’re lactose intolerant, consider using lactose-free heavy cream.
- Raw Eggs: This recipe contains raw egg yolks. Ensure you use fresh, high-quality eggs. If you’re concerned about consuming raw eggs, you can use pasteurized egg yolks or omit them, but the texture and richness might slightly differ.

Chocolate Mousse using Melted Chocolate Recipe
- Total Time: 30 minutes
Ingredients
- 200g (7 oz) high-quality dark chocolate, chopped
- 3 large egg yolks
- 1/4 cup (50g) granulated sugar
- 2 cups (475ml) heavy whipping cream, divided
- 1 teaspoon vanilla extract
- A pinch of salt
- Fresh berries or chocolate shavings for garnish (optional)
Instructions
Melt the Chocolate:
- In a heatproof bowl, melt the dark chocolate using a double boiler method or in the microwave in 20-second intervals, stirring after each interval until smooth.
- Allow it to cool slightly.
Prepare the Egg Yolk Mixture:
- In a separate bowl, whisk together the egg yolks, sugar, and salt until pale and slightly thickened.
- Gradually whisk in the melted chocolate until smooth.
Whip the Cream:
- In a large mixing bowl, whip 1.5 cups of the heavy cream until stiff peaks form.
- Reserve the remaining 1/2 cup for serving, if desired.
- Gently fold the whipped cream into the chocolate and egg yolk mixture in two additions, ensuring it’s well combined but maintaining the airy texture.
Set and Serve:
- Divide the mousse among individual serving dishes or glasses.
- Refrigerate for at least 2-3 hours, or until set.
- Before serving, you can whip the remaining 1/2 cup of heavy cream to dollop on top of the mousse.
- Garnish with chocolate shavings or fresh berries, if desired.


Notes
- Using high-quality dark chocolate is crucial for the best flavor and texture.
- Be careful not to over-whip the cream; it should be fluffy and hold its shape.
- The mousse can be made a day in advance and stored in the refrigerator.
- Category: Dessert